Get 1+ GB FREE sound effects
BLACK WEEKS: Save up to 83% on sound libraries! Huge discount on the Everything Bundle!
BLACK WEEKS: Save up to 83%!
In this article, we’ll dive into the exciting world of whoosh sound design and explore how you can craft your very own whoosh sound effects from scratch. Whoosh sounds are found in every media production on the market and we get confronted with them on a daily basis. They are very subtle, and we usually don’t notice them strongly. But they play a big role in any audiovisual production, because they draw the viewer’s attention to different points of interest. So, let’s get started and explore the world of whoosh sounds!
There are many ways of how to record a whoosh sound but to get started, I will first explain a common recording method. Take a single microphone like a shotgun mic, point it horizontally and swing the object next to it. That’s it, sounds easy, right? And it actually is… But I thought it was kind of boring so I forced myself to come up with some new thoughts and ideas that I want to share with you in this article.
I thought about how to capture every detail and movement of the whoosh and came up with the clue that it must be a microphone position thing (as it is in most cases when you are recording audio…). So I started to experiment with microphone positioning and found a solution that could capture the sound as I imagined it in my head.
I had the idea of taking three mics, placed next to each other with about 5cm-10cm distance in between all pointing to the ceiling. The panning was Left Center Right, the side mics were classic 8040s (AB positioning) and for the center I took a 8020. The 8020 in the middle is like the main microphone and the 8040s are meant to capture the stereo movement. Also I made sure that the mics were pointing to a sound absorber hanging at my ceiling to prevent early reflections from my room hitting the microphones.
Well, it’s a matter of taste to be honest but my thought behind it was that an omni directional microphone has a wider pickup range that lets you capture the whoosh better from the beginning to the end of the swing (the swung distance is about 2m-3m!). This way I was able to capture the whole movement with just one mic. But note: If your room is not acoustically optimized a more narrow microphone could be the better choice, because your room’s reflection will alter the sound immensely. Also it has to be really quiet! The 8040s shall capture the stereo movement. I wanted the stereo field to be more separated so I chose cardioid mics instead of omni mics for the sides. With that being said, let’s get over to the actual recording process.
I started with simple wood sticks which I bought at the hardware store. I made sure that the sticks were in different shapes and sizes so I don’t end up with pretty similar sounds. In general the rounder and thinner the sticks are the more tonal and swishy the sounds will be. Thicker and more cubic sticks sound rather big, less tonal and more deep. But before I started to swing the sticks, I had to check one last thing. Wind protection. You need good wind protection! Normal “foam like” windjammers will not work properly. You need a blimp and a dead cat on top. The stick cuts through the air and creates wind hitting your microphones. The faster you swing, the louder it gets and the more wind you will have. You will notice the wind as a small bassy impact in your recordings (you can even see it in the waveform!). This means you have no proper windjammers and/or the distance from stick to mic is too close. Another problem that can occur from this is wrong leveling. It’s because the wind that hits your mics creates that bass sound and the peak will be way higher than the actual sound is loud. My suggestion: Make some test recordings until you have found the sweet spot where no wind hits your mics but the whoosh doesn’t sound too much less powerful or too far away. Then you can level properly and start to record your whooshes. Now it’s time to swing some objects like your sticks. Sticks are perfect for those short swishes you hear in fast camera transitions, motion graphics and fighting scenes. Every sound designer and video producer needs to have some good whooshes, there is no way around!!
But sticks aren’t the only objects that create whoosh sounds. Ropes and clothes are very common to be used for whoosh recordings. With clothes you can create flag waving sounds, fire like pass bys or support layers for spaceship pass bys. Ropes are great for real big and long whooshes. You can swing them above your head in a circle and get some great results! You can also recreate a whoosh entirely from white noise by putting an ADR envelope on top with slow attack, decay and release (fade-in and fade-out the audio file with rather exponential than linear curves) and automating a narrow eq band that sweeps through the frequency spectrum. You can do this with synthesizers, samplers and normal audio events in your DAW.
Now after you have recorded your whooshes it’s time to process them. First I like to roll off unwanted low frequencies, denoise my samples with iZotope’s RX suite and normalize them to -6db. Then I apply some eq and shape it to the desired result. Whooshes are very close to white noise, small eq dips in certain areas will make some really big differences and can bring you closer to your desired sound. After these steps you will have some nice and clean whoosh sounds to work with as source material or support for transitions.
If you want to go further, take your favorite plugins and add a nice fx chain. Reverb and delay, some subtle compression and distortion, modulation fx and formant filtering are great effects to work with! Change their slot in the chain, automate their parameters and you will go crazy with new sounds. Layer your whooshes, pan them differently and expand your own whoosh library with some fresh new sounds. To give you an idea where to start, here is an example chain of how I like to process my whooshes: 1.) Low cut and subtractive EQ, 2.) Compression to control the dynamic range, 3.) Saturation (sometimes I put it at the end before the limiter to glue the sound together and take off some dynamics), 4.) Creative fx like modular fx, reverb/delay, formant filtering and more 5) True peak limiter at the end for safety reasons.
If you want to go further, take your favorite plugins and add a nice fx chain. Reverb and delay, some subtle compression and distortion, modulation fx and formant filtering are great effects to work with! Change their slot in the chain, automate their parameters and you will go crazy with new sounds. Layer your whooshes, pan them differently and expand your own whoosh library with some fresh new sounds. To give you an idea where to start, here is an example chain of how I like to process my whooshes: 1.) Low cut and subtractive EQ, 2.) Compression to control the dynamic range, 3.) Saturation (sometimes I put it at the end before the limiter to glue the sound together and take off some dynamics), 4.) Creative fx like modular fx, reverb/delay, formant filtering and more 5) True peak limiter at the end for safety reasons.

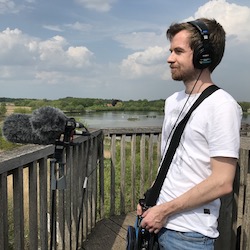
Jonas, co-founder of Just Sound Effects, is a graduated sound designer and captures field recordings all over the world, always looking for unique soundscapes and new places to explore.

All prices are net, additional VAT may apply.
By subscribing to our newsletter you agree to our privacy policy.

All prices are net, additional VAT may apply.
© 2025 JUST SOUND EFFECTS GbR – All rights reserved
By subscribing to our newsletter you agree to our privacy policy.