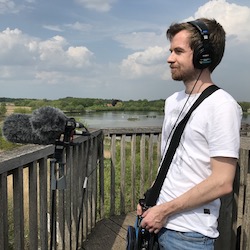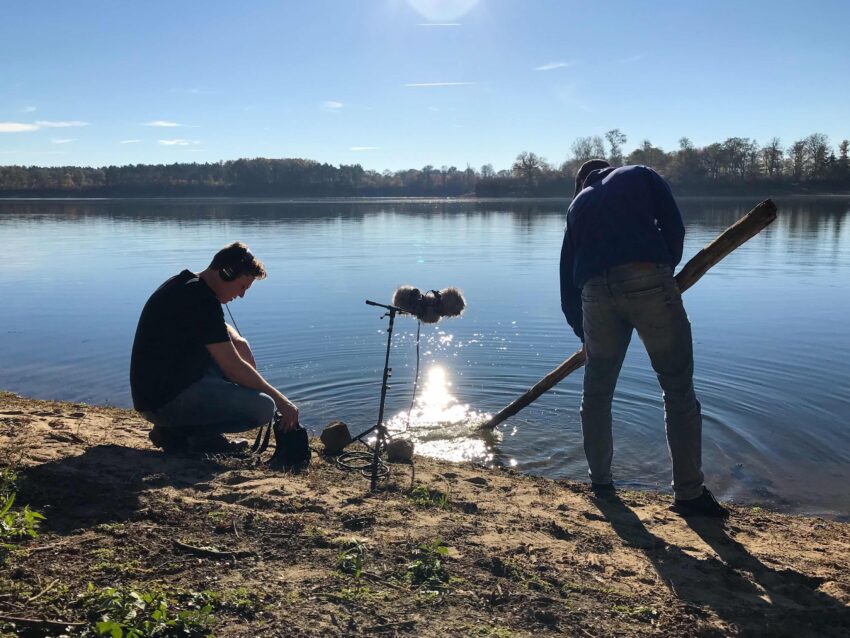
Field recording is a crucial element of sound design, as it allows sound designers to capture and manipulate real‐world sounds for use in film, television, video games and other media. At its core, field recording is the process of capturing audio outside of a studio environment, whether it be in a forest, on a city street, or somewhere else. To get the best results you have to learn what equipment you need, various techniques to capture the desired sounds with clarity and precision and how to deal with your environment. Those three aspects are the most important ones for developing professional field recording skills.
For beginner sound designers, field recording can be a valuable skill to learn, as it allows you to expand your sound libraries and develop a deeper understanding of how sound operates in different environments. In the following sections, we’ll explore the equipment and techniques necessary to get started with field recording and how it can enhance your sound design work.
1. When it comes to field recording, having the right equipment can make all the difference in capturing clear and high‐quality audio. Here are some essential equipment items to consider:
Microphone: A good microphone is the backbone of any field recording setup. There are several types of microphones commonly used for field recording, including shotgun, cardioid, and omnidirectional microphones. Shotgun microphones are highly directional and are ideal for isolating specific sounds, while cardioid microphones in a stereo ORTF setup absorb a wider sound field and are great for capturing ambiences. Omnidirectional microphones capture sound from all directions, making them useful for recording groups of people or natural soundscapes. Also they tend to have a more bassy flavor in their frequency spectrum. The Sanken co‐100k is a very popular omnidirectional mic for field recording because it captures frequencies up to 100k with extreme detail. Those recordings can be manipulated the most, but you have to record at 192kHz to unleash its power.
Recorder: A recorder is necessary for capturing and storing audio data. Portable recorders are available in a range of sizes and formats, from small handheld devices to larger multi‐ channel units. If you already have a microphone setup you should buy a multitrack recorder. If not you can think about a portable handheld recorder like the Zoom H5. This would save you some good money but on the other side it limits your recording capabilities due to their lack of inputs and format capabilities. Make sure to always record at least at 24bit/96kHz (32bit/96kHz is better but we will get to this later) to not lose information in your audio files!
Headphones: High‐quality headphones are essential for monitoring audio levels and ensuring that you are capturing the desired sounds with clarity and precision. Closed‐back headphones are recommended for field recording, as they block out external noise and provide a more accurate representation of the recorded audio.
Wind protection: Wind noise can be a significant issue when recording outside. Wind protection devices, such as foam windscreens and furry windjammers, can help reduce unwanted noise and ensure that your recordings are clear and crisp.
When choosing your equipment, consider the type of recording you want to do and the environment in which you will be recording. For example, if you are recording dialogue for a film or basic foley, a directional shotgun microphone would be ideal for isolating individual voices and sounds. On the other hand, if you are recording a natural soundscape, a stereo pair of small membrane cardioid or omni microphones might be better suited to capture the full breadth of the soundscape.
Cables and Accessories: Cables are often underrated. Cheap cables can introduce hiss noise in the upper frequencies or artifacts. Don’t buy the cheapest ones you can find! But next to the cables there are a few items that can be very helpful for when you are out on a field recording trip. Here is a short list:
- A Bag for your Recorder
- Tripod or a portable Microphone Stand
- second Set of Cables
- Notebook and Pen
- Portable Chair
- Weather Gear
- First Aid Kit
- Multi-tool or Swiss Army Knife
- Headlamp or Flashlight
- Extra Batteries/Power Banks
- Gaffer Tape
- Plastic Bags/ Waterproof Covers
- Binocular
Tips for your setup:
Investing in high‐quality equipment may seem expensive, but it can make a significant difference in the quality of your recordings. With the right equipment, you’ll be well on your way to capture clear and immersive audio that will enhance your sound design work. Here is a list of gear I would recommend for your first setup:
- A Stereo pair of small membrane cardioid microphones like the Rode NT5 or the Sennheiser MKH8040. Those are great for the most common setups like ORTF, AB, XY and MS. But of course you don’t have to use your microphones in these setups.
- A shotgun or a small membrane super cardioid microphone like the RODE NTG‐4, Sennheiser MKH 416 or the Sennheiser MKH8050 which is my personal favorite. The 8050 is the less wind sensitive microphone, because of its small capsule. This should do the job for your first recording sessions.
- A Multitrack recorder like the Zoom F6, Sound Devices MixPre 6, Tascam DR680 MK2. A good preamp is essential for a good recording.
- A pair of closed portable headphones should do the job. You don’t need the best headphones when you are out in the field.
2. While having the right equipment is important, knowing how to use that equipment effectively is just as crucial as when it comes to capturing high‐quality field recordings. Here are some techniques to keep in mind:
Adjusting microphone placement: Proper microphone placement is key to capturing clear, accurate recordings. Consider the directionality of your microphone and position it accordingly to capture the desired sound. Listen closely to the source and find the sweet spot. Then you can experiment with different microphone angles and distances to achieve the best results. (Note: Sometimes the distance between your microphones can cause phasing. Because sound travels through the air, mic A might get the signal earlier than mic B. That’s why stage guys always measure their microphones’ distances!)
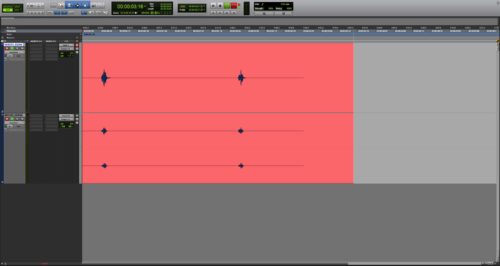
Monitoring your levels: Monitoring your audio levels throughout the recording process is essential to ensuring that your recordings are clear and distortion‐free. Use headphones to monitor your levels and adjust as necessary to avoid clipping or distortion. (Tip: use 32 bit‐float if you can and rather level too low than too high)
The correct Format: The best format for recording is without doubt 96kHz/32bit (or 192kHz/32bit in case you are recording with microphones which capture frequencies above 48kHz or electromagnetic microphones). Here are the benefits of recording at 96kHz/32bit:
- Increased Frequency Response: A 96kHz sample rate can capture frequencies up to 48kHz, which is well beyond the range of human hearing (20Hz – 20kHz). This extra frequency range might seem unnecessary, but it can be beneficial for certain post-production processes like pitch shifting, time stretching or slowing down the recording, where the extra frequencies can help maintain the quality of the audio. This is why field recordists prefer microphones like the Sennheiser MKH 8040, MKH 8050 and the Sanken co-100k, because their capturable frequency range goes above 20kHz (8040 and 8050 50kHz; co-100k 100kHz). E.g. recording with a Sure SM57 at 96kHz is nearly useless, because you will not capture more information than at 44.1kHz (only when you are time stretching it can produce a grainy sound).
- Higher Resolution Audio: A 32-bit depth provides much higher dynamic range than 16-bit or 24-bit. This means the recording can capture a larger range of volumes, from the quietest whisper to the loudest explosion, without distortion. This is particularly useful in field recording where the sound environment can be unpredictable and you might need to capture very quiet or very loud sounds. (Tip: After you cleaned up your recordings exporting them in 24bit is totally enough)
- Noise Floor and Distortion: The higher bit depth reduces the noise floor of the quantization noise (every preamp and microphone has a quantization noise, the better the equipment and format the better the less noise you will have – you can hear it when you crank up the volume) and distortion associated with digital audio recording. This can be particularly beneficial when recording quiet sounds in the field.
Reducing noise: External noise can be a significant issue when recording outside. To reduce unwanted noise, try recording in quieter areas or use noise reduction tools in post‐ production. Your microphones’ characteristics also play a big role. E.g. an omnidirectional microphone will pick up more of the sounds around you than a cardioid or super cardioid mic does. Additionally, consider using wind protection devices to minimize wind noise. (Tip: Make sure your microphones point in the opposite direction of the noise source. This prevents background noises from hitting the microphone.)
Mono or Stereo: If you should record in mono or stereo it is up to the end placement of the recorded sound. Imagine the sound of someone placing a glass on a desk. Now in an audio-visual scene, the sound would be always placed in mono, because it simply has no stereo information and would sound weird and confusing. An atmosphere recorded in mono would sound boring and non‐realistic. We like to record most sounds with a center mic like the MKH8050 and a stereo pair of MKH8040 to give our customers their own choice what signal they want to use.
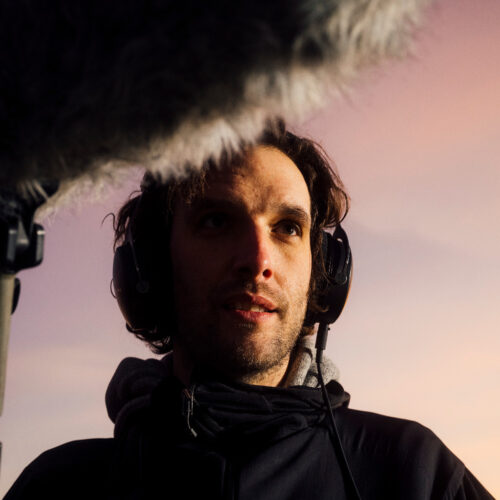
Remember that field recording is an art as much as it is a science. Experiment with different techniques and equipment to find the approach that works best for you and the sounds you want to capture. There is no right or wrong. If it sounds good, then you have got the job done well. With practice and persistence, you can create immersive and engaging soundscapes that will enhance your sound design work.
Once you’ve captured your field recordings, the next step is to process and edit them to achieve the desired sound.
3. Here are some tips for post‐processing field recordings:
All in all the less post processing you have to do, the better. But if you are recording out in nature you probably won’t get around it if you want super clean sounds.
Cleaning up recordings: Before editing your recordings, it’s important to clean up any unwanted noise or distortion. Use noise reduction tools and EQ to remove unwanted frequencies and adjust levels to balance out the sound. A small low cut at 40Hz or below plus some denoising with iZotope’s RX Suite is always a great start. Next, I like to use BOOM’s ReCenter plugin to shape the stereo image (only necessary for stereo recordings) and then normalize the sounds to ‐6db. The normalization makes sure that when you layer your samples, you still have headroom left and cause no clipping. One thing we never do is eqing our recordings and altering their character. Eqing in post production is only useful for removing unwanted frequencies like humms or low end rumble (Tip: Sometimes a narrow eq band works better for removing humms than denoising it with plugins).
Organizing and storing recordings: As you accumulate more and more field recordings, it’s important to have a system for organizing and storing them. Use descriptive file names and tags to make it easy to find specific recordings in the future. The best way is to use the Universal Category System (UCS) and embed the metadata with programs like Soundminer Pro.
In terms of software, there are many options available for post‐processing and editing field recordings. Popular choices include Pro Tools, Nuendo, Reaper and iZotope’s RX Suite. All are user‐friendly and offer a range of editing tools and effects. All in all, Reaper is the best for editing sound effects as it has the most and nearly endless possibilities to shape the DAW to your needs.
Remember, post‐processing and editing is just as important as the recording process itself. By cleaning up, editing, and enhancing your recordings, you can create a professional and polished sound that will enhance your sound design work.
4. Conclusion
But now let’s answer the question why field recording is essential for good sound design work. The better your recordings are, the better your sound design work will be, it’s simple. If you have ever experienced mixing music that was recorded with bad microphones in a garage played live you will know what I am talking about. The result will never ever be as good as if it was recorded by a professional with premium mics and preamps in a perfect studio. When you record your sounds, let’s say with your phone, the frequency spectrum will be much smaller and unbalanced than with a MKH8040. What happens is the more you manipulate your recording the more bad it will sound and this limits your creative process. That’s why professional equipment is worth every penny.
This article is just like the tip of an iceberg, there are so many things to be aware of when you are on the journey of field recording. But same as in most other skills we learn, be patient, always extend your knowledge and practice makes perfect. I hope I could give you a brief overview of what to watch for, when starting your field recording career.