Recording large amounts of sound effects can be very overwhelming. But there are several tips and tricks that not only boost your recording workflow but also save you time in the later editing/archiving process.
1) Make a Plan
A good plan in the beginning is key to a fast workflow later on. Yes, it can be very time consuming but it pays off later on!
Point out your ideas and make a list of what you want to record. Think about how the sound should sound like and what recording techniques are the best. Will it be in stereo or mono? Should it sound wide or rather narrow? What frequencies does the sound display and what microphone is the best to capture that? Where will the sound be used later on? All those questions help you to make a detailed plan and save time later on.
A simple Excel sheet is a good way to make the list. You can create several columns with different headers like Microphone, Material, Performance, Number of Variations, Key and more and let Excel automatically create a name that you can copy into your session later on.
2) Create your own Templates
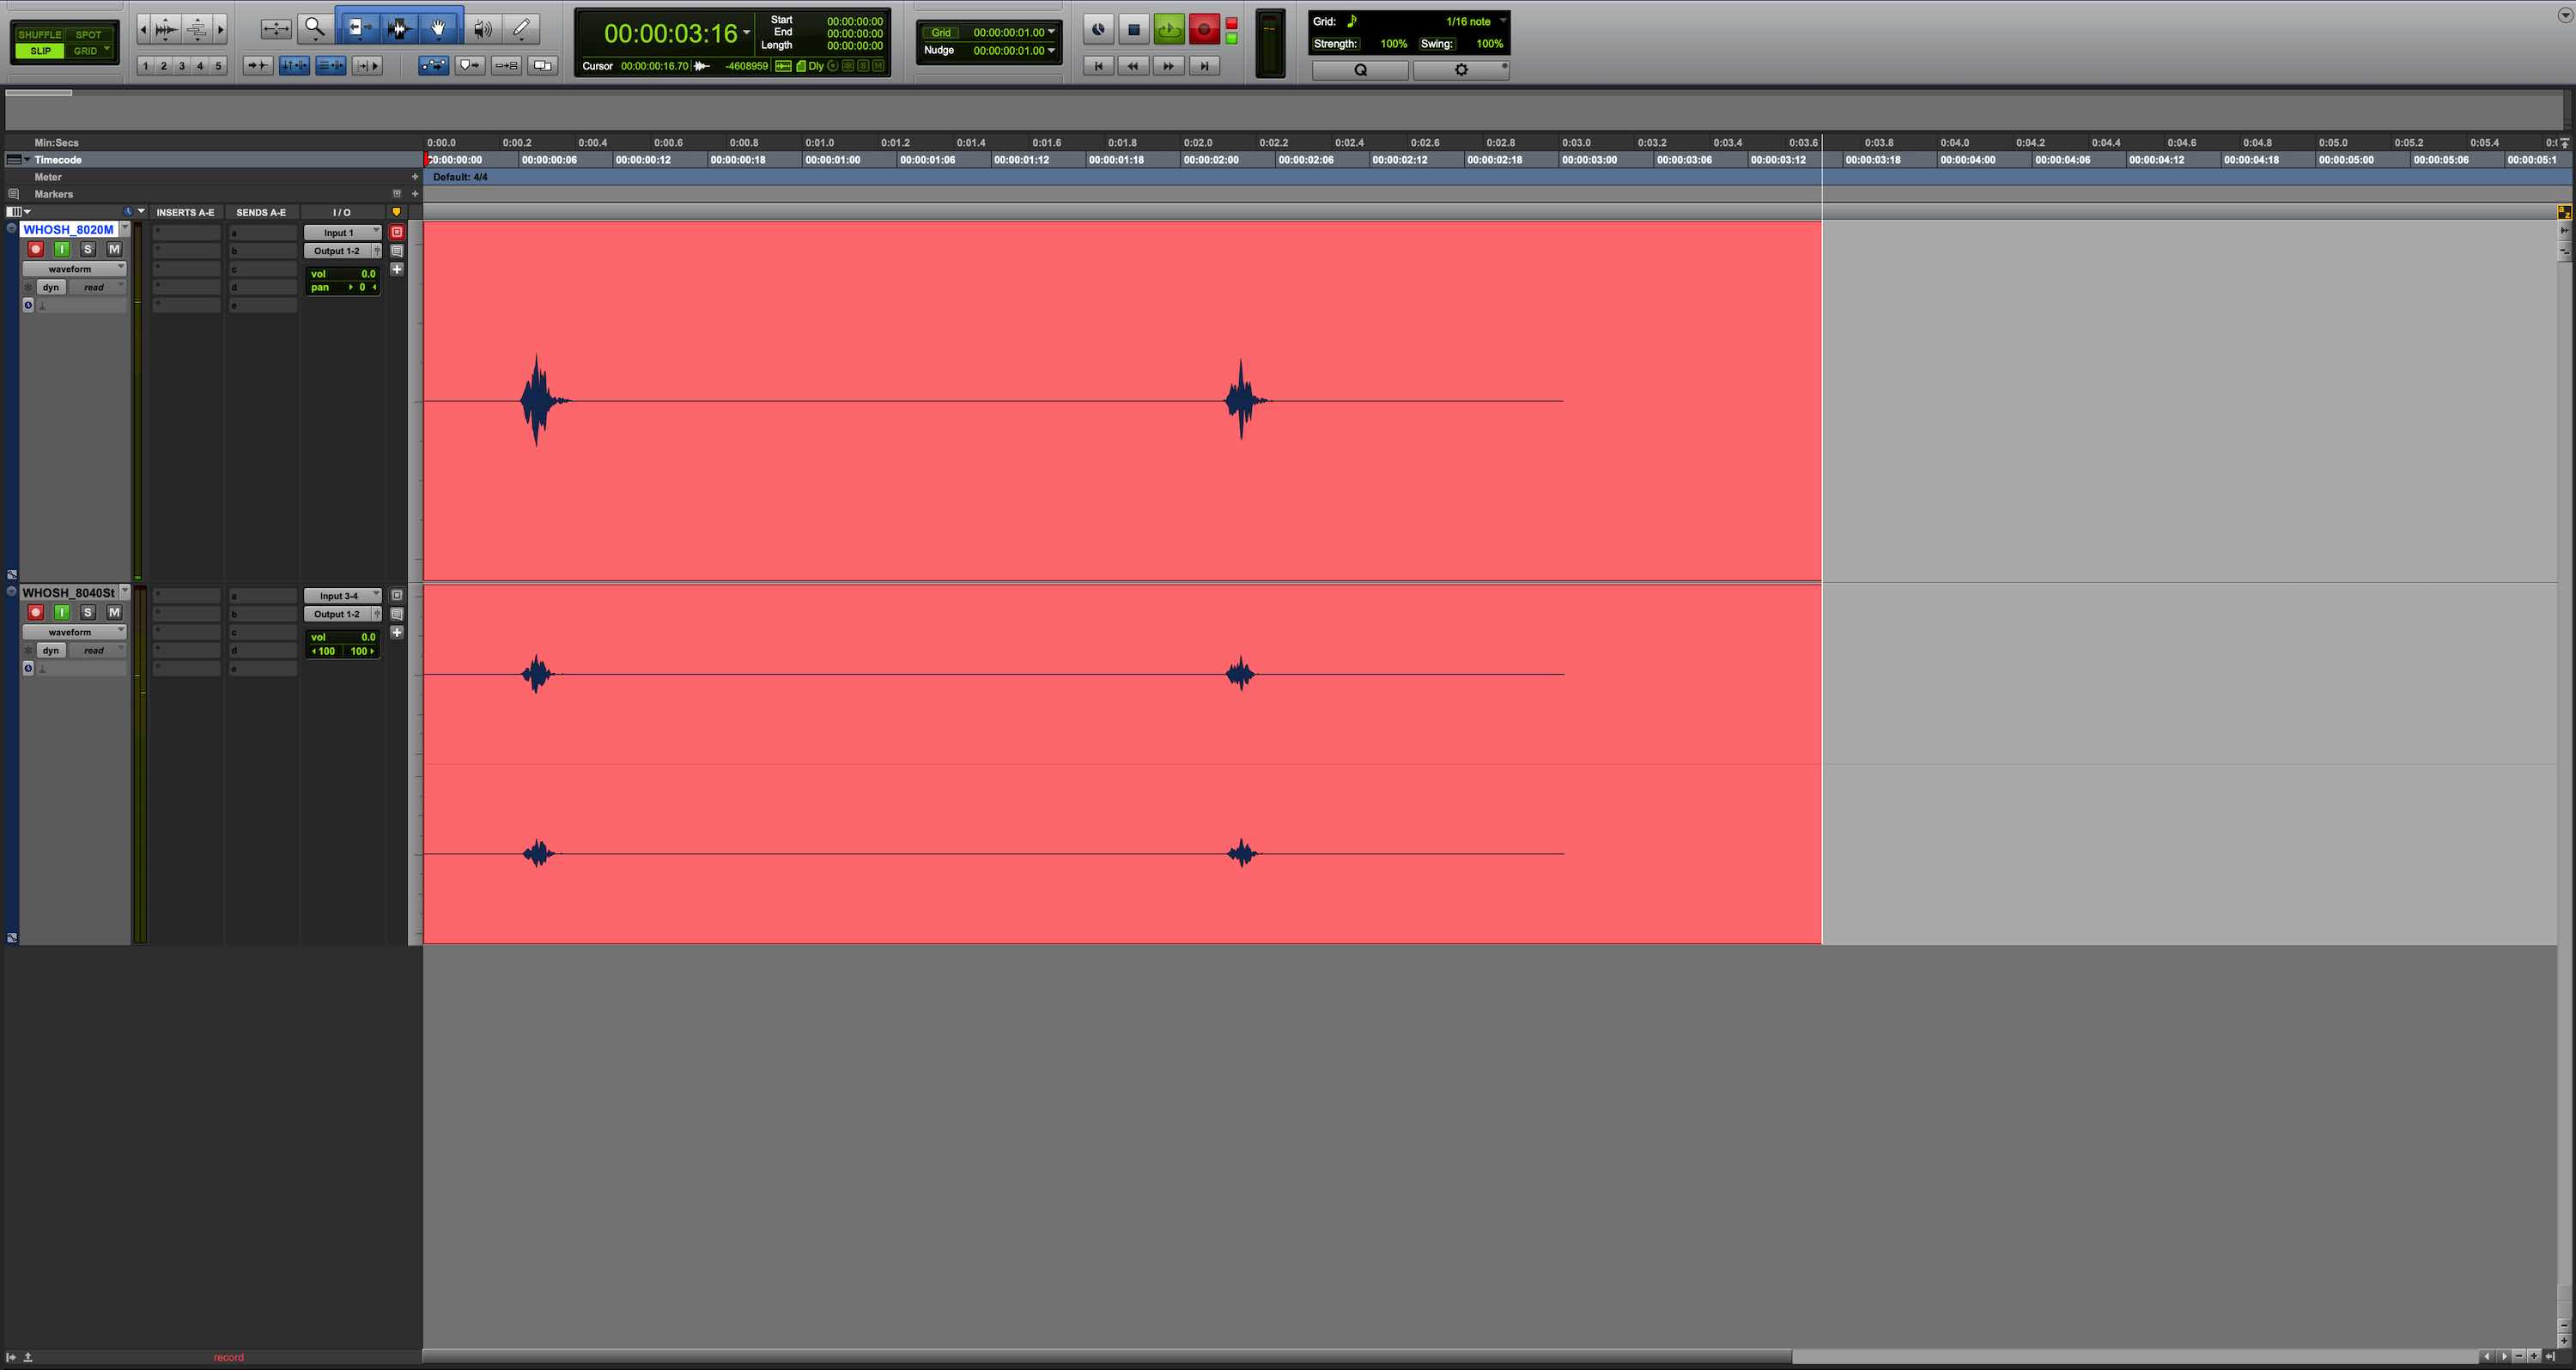
Everyone has their own workflow and method of recording. You probably caught yourself many times creating those same sessions, FX chains, Plugin Settings and more over and over again. Take your time to save your settings and best create whole session templates fitted to your needs. For example you always record with a mono mic and a stereo pair and route that into a PreMaster AUX-Track which has a certain FX Chain. Instead of creating them every time you can simply make a template session where the tracks are configured properly and sitting in a folder from where you can copy. The tracks should be named like that: “NAME_MIC_M” for Mono tracks and “NAME_MIC_S” for Stereo tracks. Now every time you make a new recording, just copy the empty existing ones from your folder and batch rename them by replacing NAME with the actual file name. Another benefit from that technique is that your audio files folder will be way more organized, as every audio file is already named after its track name and also displays how it was recorded.
3) Level, Pan and Phase
Good leveling, a clean panorama and correct phase are key for a good recording. When you start a new recording, make sure that your preamp is peaking at around 12db – 10db and the master channel’s panorama is balanced (listen to the recordings and don’t only trust the displayed peak values). (Tip: The lower the gain on your preamp the less noise it will bring to your sound.) Then make a test recording and check the phase but especially the frequency spectrum. If you notice some heavy low frequencies it will often probably be rather air hitting your microphone capsule than the sound itself. This means that you should check your wind protection and/or reconfigure your mic positions. And don’t forget: Never ever level during a recording!!! This will change the noise floor and likely cause artifacts when you denoise the recordings. It’s better to kill the recording and redo it. Your panorama can be varied in its width by changing the stereo technique, adjusting the distance to the sound source or simply changing the distance between your stereo microphones. Sometimes a smaller distance between your stereo mics will increase its width so try before you decide what’s best for your recording.
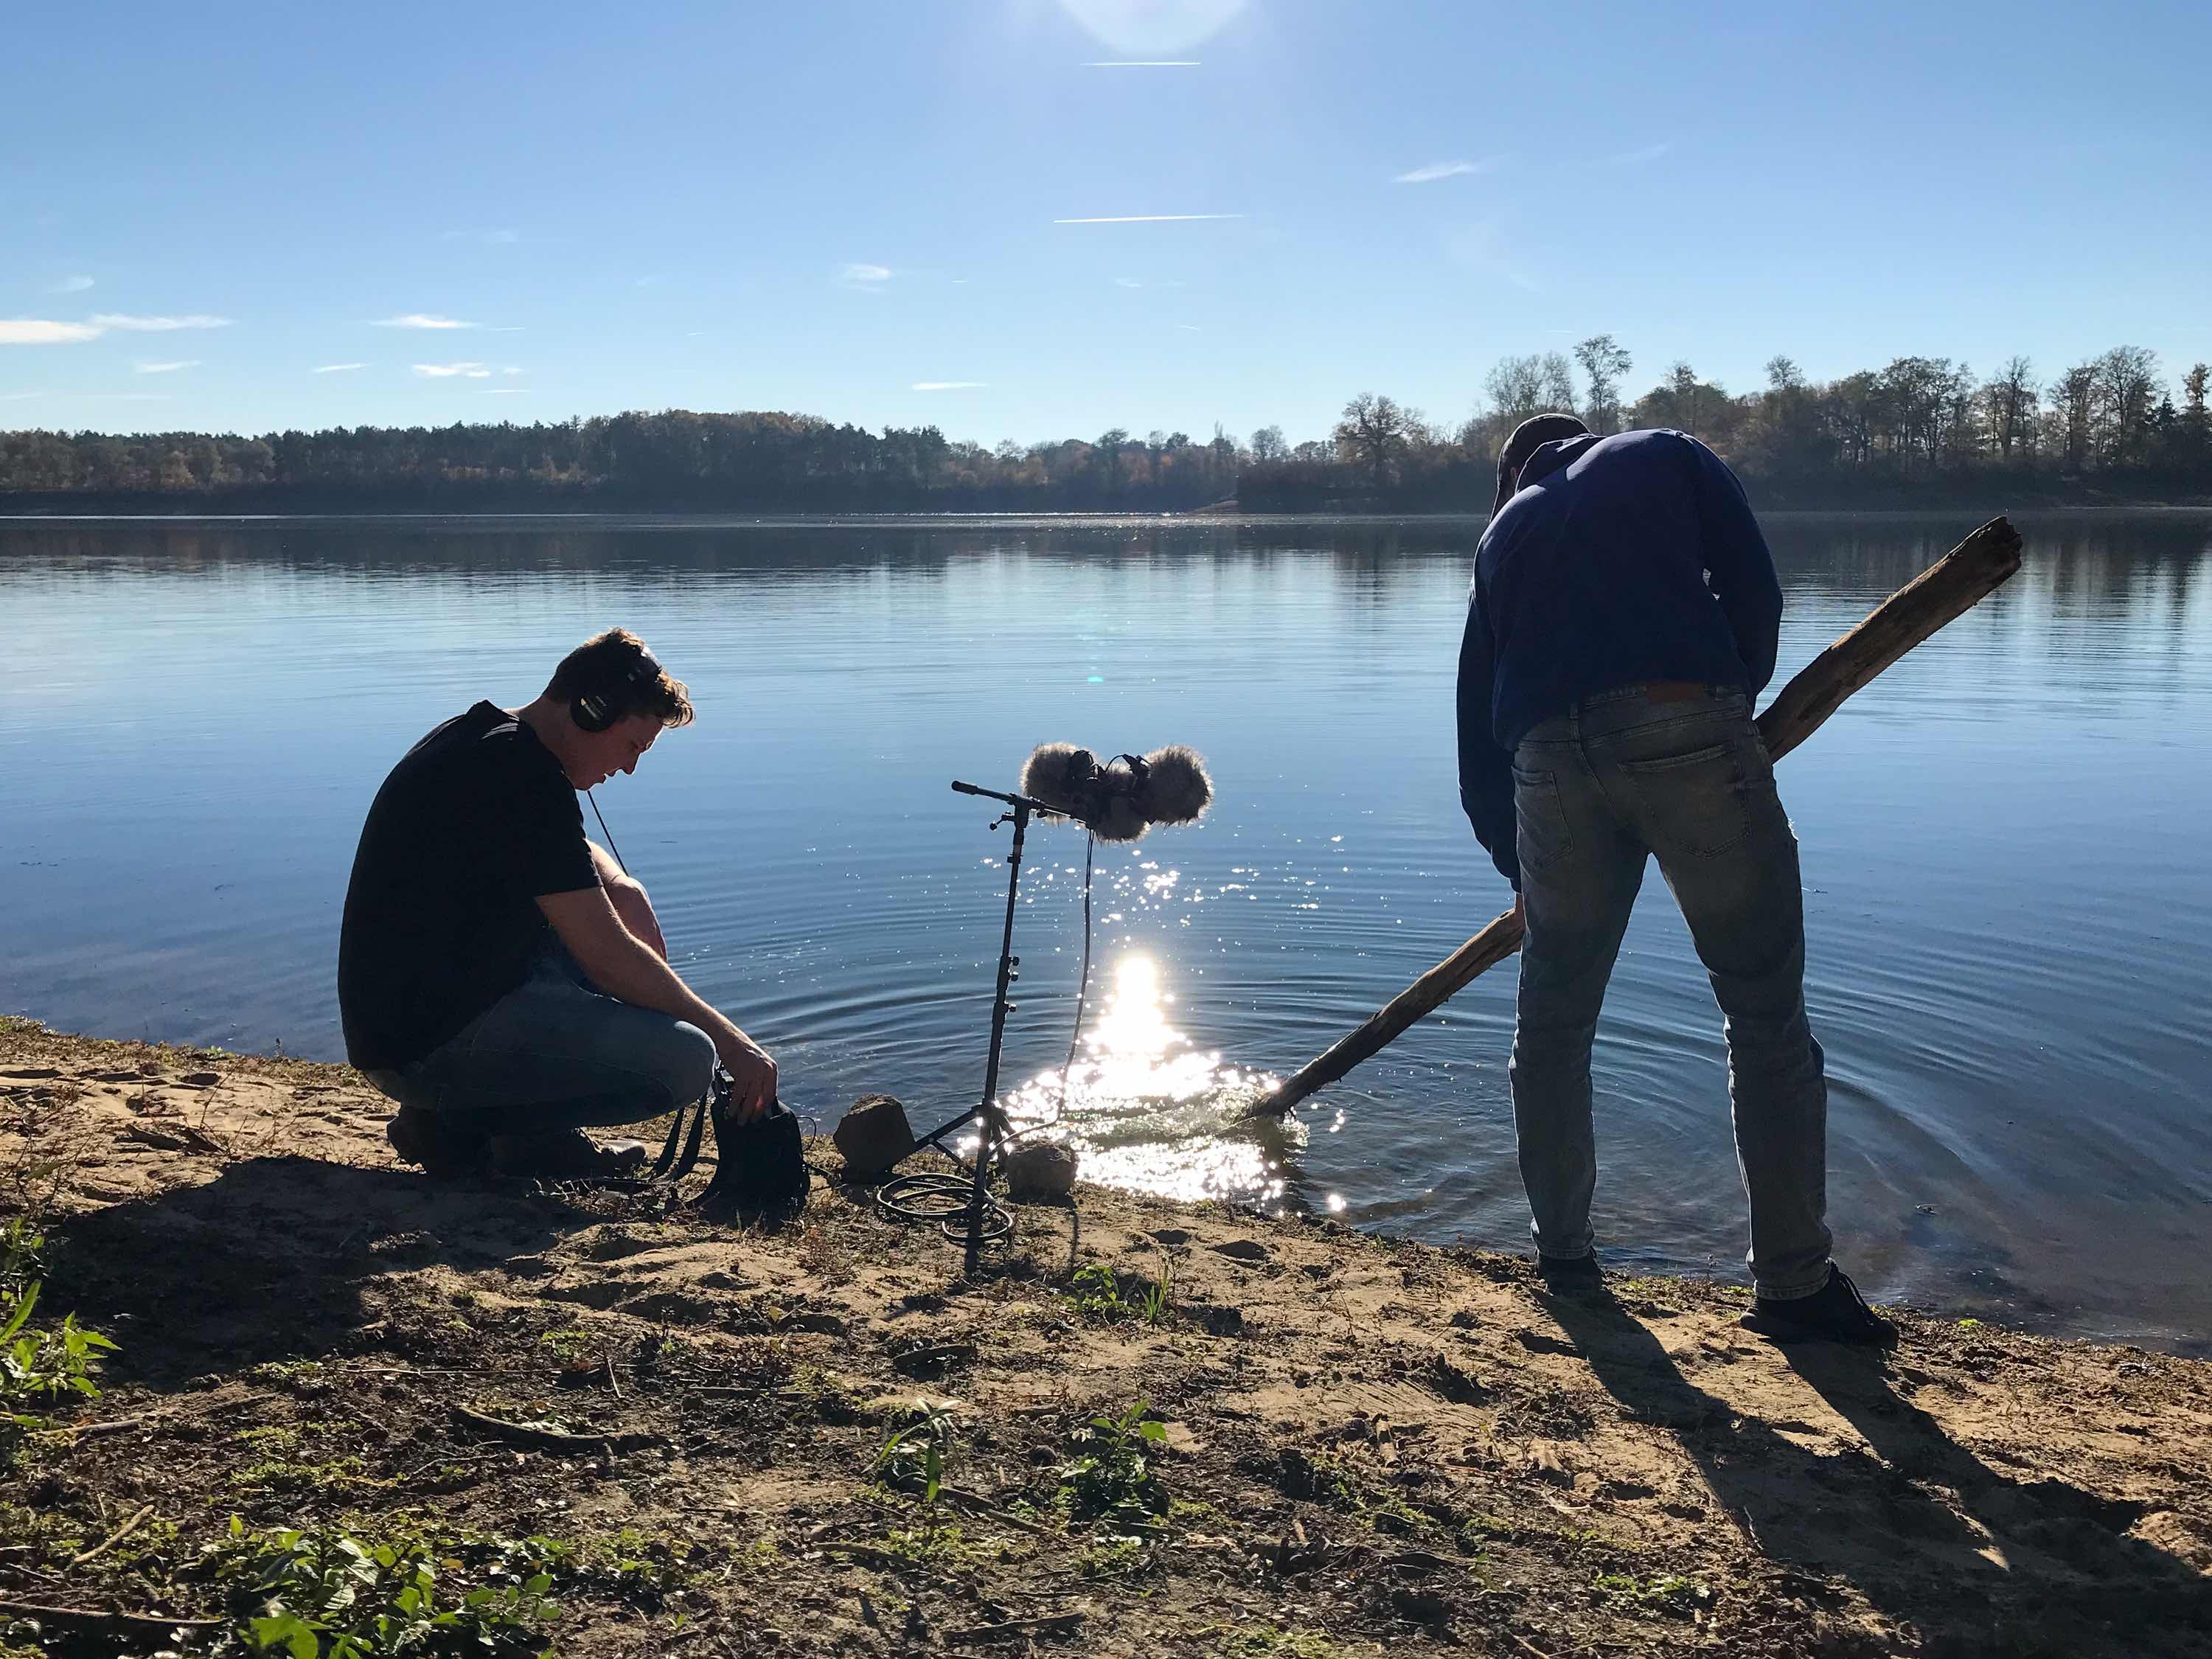
4) During the Recording
Most important: Stay quiet! Wear clothes that don’t make much noise, breathe quietly so that you can’t hear it and stand still – an empty stomach is also not a good idea ;-). The less background noises you have, the easier the cutting will be and the better your sounds will be. If you want your sounds to have some silence between each other later on then consider if recording to a click track would be beneficial so you don’t have to move every clip later on and can just quantize it to grid.
5) Working with Scripts
Nowaday scripting has become more and more easy because you have AI that helps you and the internet is full of tutorials. You don’t need to be a software engineer! However, writing a script from scratch might be a little too hard but there is software like SoundFlow which gives you many presets and macros to write your own scripts without entering the Java code. Being honest, working with scripts saves the most time. I made several ones for ProTools that for example let us create tons of tracks with the proper settings and naming in just one click or normalize and export stems from sessions in no time. All in all we only need to make a plan, open our template, let SoundFlow create the tracks and press the REC button. Then comes the batch denoising which is automated as well and after sorting out bad takes SoundFlow normalizes and exports every track automatically. This saves tons of time!
I hope this blog article gives you some new ideas of how you can improve your workflow in this busy timeage. Feel free to leave a comment and ask your questions!